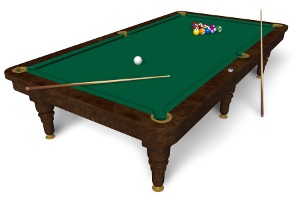
How to Move and Store a Pool Table

When you’re a billiards enthusiast, there’s little that’s more satisfying than having a pool table right in your own home. The ability to practice whenever you like or enjoy a rousing game of 8-ball with friends is a perk that pool sharks everywhere can’t deny. Most pool table owners admit that their table is even one of their most prized possessions that they use several times throughout the week.
If you’re planning to move soon, you might be worried about how to take your prized pool table along with you. At the very least, you’re probably thinking about how to move your move table in the most efficient, inexpensive way possible. And, when it comes to moving a pool table to a new home or into a self storage facility, there are certain steps that need to be taken to ensure the process goes as smoothly as possible and that your pool table stays in great condition. These steps are especially vital to know if you’ll be moving it yourself.
How to Move a Pool Table
There’s no way around it; moving a pool table without professional help will take some muscle strength! Enlist some friends, because it will be near impossible to tackle this chore all alone. You’ll also need to completely disassemble it, so if you have the manual the table came with, now is the time to dig that out so you know the proper procedures for your brand or style of table. Next, make sure you’ve got tools like a staple puller, a socket wrench, flat head screwdrivers, a power drill and safety goggles. Finally, before moving a pool table you should also have some packing supplies ready to go, like moving blankets or bubble wrap, plus packing tape and sealable plastic bags for any small parts.
Here are five steps for successfully moving a pool table onto your rental truck:
- Unfasten and remove the pockets. Use the staple puller or screwdriver to remove the six side pockets. This is also where your safety goggles come in to protect your eyes from any potentially flying small parts.
- Take off the rails. Loosen the bolts holding in the rails by using a socket wrench. Then, have your friends help you slide them out gently, placing the rails right on a moving blanket for safe transport. Keep all the bolts, screws, nuts and other small pieces sealed together in a plastic bag.
- Remove the felt. The felt will be stapled right to the pool table or glued on, and removing it is a very delicate process unless you’ll be replacing it after the move. While removing the staples or pulling it up if it’s glued on, try not to stretch or pull too hard as this will cause it to lose its shape. Fold the felt carefully once you have gotten it off the table and place to the side.
- Lift off the slate. The slate will be screwed down and needs to be removed with a power drill. Removing the slate is where your helpers will really come into play, as the slate may be in one to three pieces and can weigh a total of around 800 pounds! Once the screws have been removed, use the combined strength of your helpers to lift the slate off the frame and set it down on a moving blanket. Keep all the screws and pieces together in a plastic bag.
- Remove the frame and legs. Finally, the last step before moving a pool table is to flip it over to remove each leg from the frame, as well as any other detachable pieces.
Storing a Pool Table
Knowing how to move a pool table is important, but you should also know how to store it properly so it doesn’t get damaged if you’ll be keeping it in your self storage unit for any length of time. Renting a climate controlled self storage unit for your pool table is the best option, as the constant temperature means the wood will not warp or buckle while it’s being stored.
In your storage unit, place plastic sheeting on the floor and lay the slate on top of it, covering each individual piece with more plastic adhered with packing tape before stacking the next piece on top (if there was more than one piece of slate). Keep the other elements of the pool table wrapped in the moving blankets and set them on top of the slate- the frame, legs and pockets. The felt should be kept folded neatly in a sealed plastic bag to protect it from damage. Finally, keep the bags of screws, nuts and bolts with the table parts so you’ll have everything ready to go for reassembly.
National Storage have a variety of sizes of climate controlled storage units at our 51 locations throughout Michigan and Ohio. Contact us today to find out how we can assist with all your household storage needs!